Now that the ductwork is in, the painter can put the finishing touches on the joists, and then the floor can be installed, then the kitchen cabinets, closets, finished plumbing, finished electrical, etc. can come in.
Sunday, October 18, 2009
Ducted
Sunday, June 28, 2009
Colorful
"Buggs" (because he's got really long bug's legs, I'm told) applying the American Clay plaster finish to a wall in — I think — my bedroom.
The advantages of this product are several:
- Aesthetic -- it gives the walls more depth and earthiness than paint would
- Environmental -- natural, no VOCs
- Comfort -- soaks up humidity (it doesn't "set) and releases it over time.
Permanent Stairway to Work
The temporary staircase to the loft/office is now gone (there's a story there you'll have to ask me about), replaced by the permanent and very cool steel staircase fabricated by the fine local Monroe, WI craftsmen at — er, I forget. I'm sure someone will remind me.
The treads are made from leftover ceiling joist remnants. Like everything else in the house, it's "stout."
Friday, May 29, 2009
"The Meter Must Be Broken"
That's what the meter reader said, when he saw a negative 800 or so kilowatts for this month's consumption, and the panels pumping out 700 watts on a cloudy day. He wants to replace the meter.
Knock yourself out, buddy, it's not going to help. We're coming into peak solar production season, and since the house is still under construction, the electrical load is minimal — a table saw here and there, a compressor once in a while.
Monday, May 25, 2009
Saturday, May 16, 2009
Finishing Touches, Part One
Saturday, May 09, 2009
Floor on the Ceiling
Sunday, May 03, 2009
Expensive House on the Prairie
New View
Beautiful Day in the Neighborhood
Saturday, April 11, 2009
Aluminum, Concrete and Cedar
View from the terrace on top of the guest wing.
In the left foreground is the master bedroom and in the middle, the living/dining room. Note that the MBR is separated from the LR/DR to let me me shut it off from the rest of the house and allow friends to have the run of the place without finding my "etchings." ["joke only", as they say in the Philippines].
I'm diggin' this High Dynamic Range photography stuff...
Guest Wing
The guest wing, newly drywalled and taped, but not yet plastered. Those guys work fast.
This drywall variety is called "blue board", but even in real life it's gray. I kindof like the color, and it might contrast nicely with the floor, but I suspect we'll do something that's not quite so monochromatic.
Current thinking is to coat this in pigmented natural plaster, possibly from American Clay or its ilk. I'm thinking this will give the wall surfaces some depth and subtle variation.
Drywalled
In modern architecture, typically more of the structure is exposed and the transitions between surfaces and materials are visible. You don't just tack on some molding to hide the joints.
Hence, the ongoing conversation. Some of this is also due to our philosophy of "lets decide when we have to". It's impossible for any of us — architect, builder and especially the client — to perfectly visualize the end product in advance.
(By the way, what's glaringly wrong with this picture, and why did it happen? For some subtle hints, see the High Dynamic Range post. It's not the Photomatix watermark).
The (High Dynamic) Range
The view from the West deck. We made sure the Burr Oak was saved during construction -- the other trees that had to be removed were salvaged for flooring.
I wish I could say all that beautiful land was mine, but I'm a working stiff (again, starting Monday), and I'd need to blow out my commission for a few decades in a row before being able to afford it. But for now, I can play "pretend Land Baron" and hope that it doesn't get developed in my lifetime.
Note: This photo is my first attempt at High Dynamic Range Photography, which attempts to compensate for narrow range of film and digital camera sensors compared to the human eye/brain. This inability to capture all the colors and intensities of light is a big reason why you're almost always disappointed by your photographs ("gee, I remember the sky being blue, not white, when I took that picture.")
To get a picture that looks more like what your eye saw, you need to "bracket" your photos by deliberately under- and over-exposing the image, then merge the properly exposed parts of each image into one composite, realistic photo. This process, made easy by digital photography, would require all kinds of "dodging" and "burning in" with film photography.
I discovered a terrific book, Complete Guide to High Dynamic Range Digital Photography, by McCollough. The author turned me on to an application called Photomatix, which is easy to use and seems to provide for good results. It also makes it pretty easy to make fairly unrealistic images (I jacked up the saturation on this picture), but I will endeavor to use my new powers for good, not evil.
Thursday, March 12, 2009
Photons, Part Deux
The solar panels have been working since Tuesday, and today I got to see the meter wheel spinning backwards, the sign that power is flowing back into the grid rather than from it. It's all about the Benjamins...
Output this afternoon was about 2,600 watts, less than the 3,100 rated watts, but we'll work on that.
The inverter display has a unique rap-with-your-knuckle interface that discourages (ouch!) obsessive checking, but otherwise provides useful information.
1,000 cfm @ 50 pascals
The result: 1,000 cubic feet per minute at 50 pascals. Recall that 2,380 cubic feet per minute (0.2 - 0.3 air changes per hour naturally) is the Energy Star requirement and that a more aggressive, but reasonable target is 1,200-1,500 cfm (0.1 - 0.15 air changes).
The blower door made it easy to find leaks that otherwise would have been missed, and Barry plugged as many as he could.
And we can do better -- there were a few areas that Barry couldn't seal right away, but which will be done before the drywallers come in. We think we can get down to 800 cfm, which is very, very good, particularly considering how much wall we have compared to the volume of the house.
Money well worth spending (I think, I haven't yet seen the bill).
Wednesday, March 11, 2009
Spatial
Tuesday, March 10, 2009
Photons
We have photon power — the solar dude from Full Spectrum Solar and the gentleman from Alliant Energy tested and commissioned the system today.
With the fog, the panels were putting out 200 watts — quite the return on investment!
The blower door test is scheduled for this Thursday afternoon. This will be a great test of construction/insulation quality.
Friday, March 06, 2009
Insulated
The energy-saving philosophy nowadays is "build it tight, ventilate it right." Above is an example of the first part.
Now that most of the rough electrical and plumbing is done, and the weather is above 40 degrees (for the moment), the foam insulation can be sprayed on. The Gaco Western 2 pound high-density spray foam has an excellent R value of 7 per inch and, because it seals air leaks (unlike batt insulation), eliminates the need for a vapor barrier.
The next step is to do a "blower door test" to see how air-tight the building is. GDS Associates, our Energy Star consultant, will perform a blower door test that tries to suck the all air out of the house. If the house is well-sealed, very little air will flow through; if it's leaky, then a lot of air will come through the blower door.
To get an Energy Star certification for the house, we need less than 2,380 cubic feet per minute (0.2 - 0.3 air changes per hour naturally) can flow through the meter at a test pressure of 50 pascals. We're going for, however, a tougher target of 1,200-1,500 cfm @50pa (0.1 - 0.15 air changes).
We're going to do this blower door test as soon as the insulation is finished, and before we put the drywall on. This is so that we can easily find any leaks (with a smoke pencil) and seal them up. If we put the drywall up first, we might have to tear some of it down to plug some leaks.
This airtightness creates a new problem, mold. So the "ventilate it right" part becomes critical in bringing in fresh air and maintaining humidity. We'll use an "energy recovery ventilator" to exchange stale indoor air for fresh, filtered outdoor air, and will minimize the loss of heat (in the winter) by sucking most of the heat from the exhaust air before it leaves the structure.
Wednesday, March 04, 2009
Ah Ha!
Closer view of the previously discussed solar "ah ha!" wall installation. The idea is that once the landscaping is done, I won't be able to see the panels from the house.
Now if the panels would only work...
[Update--panels now work--wires were reversed at the inverter. Now we have to convince the guy from the utility to come back and certify the installation.]
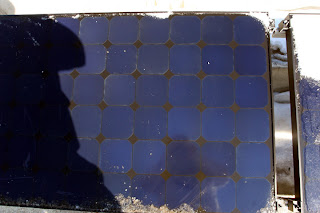
These are the panels, from Sunpower. Pretty nice looking compared to your average panel, eh?
The inverter for the solar panels that, as of today, works. As they do in all the best science fiction shows, they reversed the polarity, and it came to life.
Mechanical, etc.
Entry door, with fancy handle and even fancier keypad lock.
Radiant heating reflectors underneath the loft/office. The radiant heat tubes for the main floor are buried in gypcrete, which apparently is the better way to go -- more even heat, easier on the wood floor.
The mechanicals/utility room.
This is the NTI boiler that will heat the house. Apparently it's 5,000% efficient (OK, 93% or something like that), and silent. My old microwave was bigger and a lot noisier.
Ceiling, Part Deux
The first ceiling, which was part of our Arctic Hot Roof (or was that an Arctic Cold Roof"?) fell victim to an early snow in late 2007 (yes, it's been that long) that prevented the final galvalume roof exterior from being installed. Everything was fine until the big Spring thaw, when the beautiful Maple panels got soaked. So, we went with Plan B.
Looks pretty good, perhaps better than Plan A.
Saturday, February 07, 2009
Photosynthetic
You may have heard of Photosynth, the Microsoft tool that lets you knit together various photographs of a scene to provide multiple perspectives. CNN used it to pull together hundreds of photos of the Inauguration:
http://www.cnn.com/SPECIALS/2009/44.president/inauguration/themoment/index.html
If you're running Internet Explorer, here's my first attempt at a Photosynth for Rancho Deluxe:
http://www.cnn.com/SPECIALS/2009/44.president/inauguration/themoment/index.html
If you're running Internet Explorer, here's my first attempt at a Photosynth for Rancho Deluxe:
Friday, February 06, 2009
Sweating the Details
Barry the Builder (facing) and Ted the Architect (bad hat) making sure they're on the same page for finishing off the curtain wall. The conversation got pretty philosophical about the intersection of design and building, which is very cool.
The chairs are from the Liberty Series from HumanScale, designed by Neils Diffrient. I have his Freedom Chair at the condo, and it's terrific. Beats the heck out of the Aeron for back support.
Winter Wonderland
Subscribe to:
Posts (Atom)